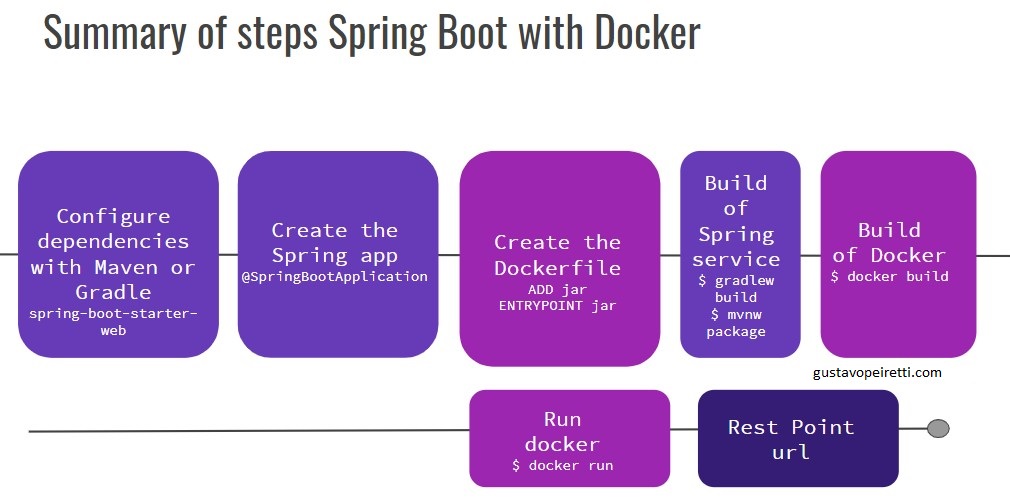
We will learn how to run a Spring Boot microservice inside a Docker container
In a previous post we learned how to install Docker and how to run a Java Hello Word inside the Docker container. Now we will learn how to run a Spring Boot microservice application within Docker.
Minimum dependencies of a Spring Boot microservice
The first thing we are going to do is define the dependencies we need. Spring Boot requires at least these dependencies:
org.springframework.boot:spring-boot-starter-web
org.springframework.boot:spring-boot-starter-test
The configuration for Gradle of these dependencies is:
plugins {
	id 'org.springframework.boot' version '2.1.9.RELEASE'
	id 'io.spring.dependency-management' version '1.0.8.RELEASE'
	id 'java'
}

group = 'com.gustavopeiretti'
version = '0.0.1-SNAPSHOT'
sourceCompatibility = '1.8'

repositories {
	mavenCentral()
}

dependencies {
	implementation 'org.springframework.boot:spring-boot-starter-web'
	testImplementation 'org.springframework.boot:spring-boot-starter-test'
}
The configuration for Maven of these dependencies for Spring Boot:
<project xmlns="http://maven.apache.org/POM/4.0.0" xmlns:xsi="http://www.w3.org/2001/XMLSchema-instance"
	xsi:schemaLocation="http://maven.apache.org/POM/4.0.0 https://maven.apache.org/xsd/maven-4.0.0.xsd">
	<modelVersion>4.0.0</modelVersion>
	<parent>
		<groupId>org.springframework.boot</groupId>
		<artifactId>spring-boot-starter-parent</artifactId>
		<version>2.1.9.RELEASE</version>
		<relativePath/> <!-- lookup parent from repository -->
	</parent>
	<groupId>com.gustavopeiretti</groupId>
	<artifactId>springbootdocker</artifactId>
	<version>0.0.1-SNAPSHOT</version>
	<name>springbootdocker</name>
	<description>Demo project for Spring Boot with Docker</description>

	<properties>
		<java.version>1.8</java.version>
	</properties>

	<dependencies>
		<dependency>
			<groupId>org.springframework.boot</groupId>
			<artifactId>spring-boot-starter-web</artifactId>
		</dependency>

		<dependency>
			<groupId>org.springframework.boot</groupId>
			<artifactId>spring-boot-starter-test</artifactId>
			<scope>test</scope>
		</dependency>
	</dependencies>

	<build>
		<plugins>
			<plugin>
				<groupId>org.springframework.boot</groupId>
				<artifactId>spring-boot-maven-plugin</artifactId>
			</plugin>
		</plugins>
	</build>

</project>
Create the Spring Boot microservice
You must create the main class that Spring will start.
We annotate the class with @SpringBootApplication.
The @SpringBootApplication annotation is equivalent to using @Configuration + @EnableAutoConfiguration + @ComponentScan with its default attributes.
Check out this other post for more details about the main class
@SpringBootApplication
public class SpringbootdockerApplication {

	public static void main(String[] args) {
		SpringApplication.run(SpringbootdockerApplication.class, args);
	}

}
Then create a ‘rest controller’ that you annotate with RestController.
Create a Home class and annotate the method with RequestMapping.
The home method below maps the base path of your services.
You can read more about RestController
@RestController
public class Home {

    @RequestMapping("/")
    public String home() {
        return "Hello Spring Boot with Docker";
    }

}
.
You can run the application from the console.
- If you use gradle gradle bootRun
- If you use maven mvn spring-boot:run
- If you use the gradle wrapper ./gradlew bootRun
This is the console for ./gradlew bootRun
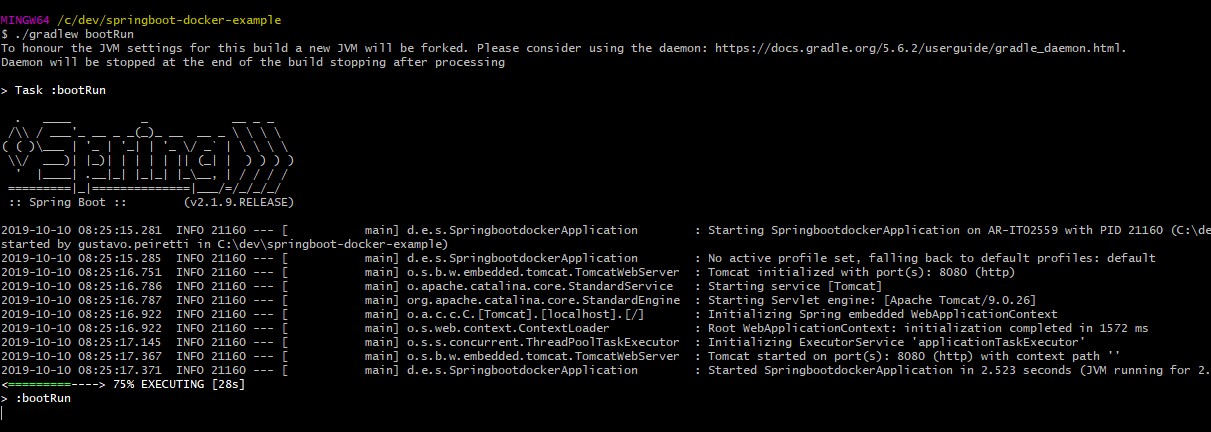
Open the URL localhost:8080.

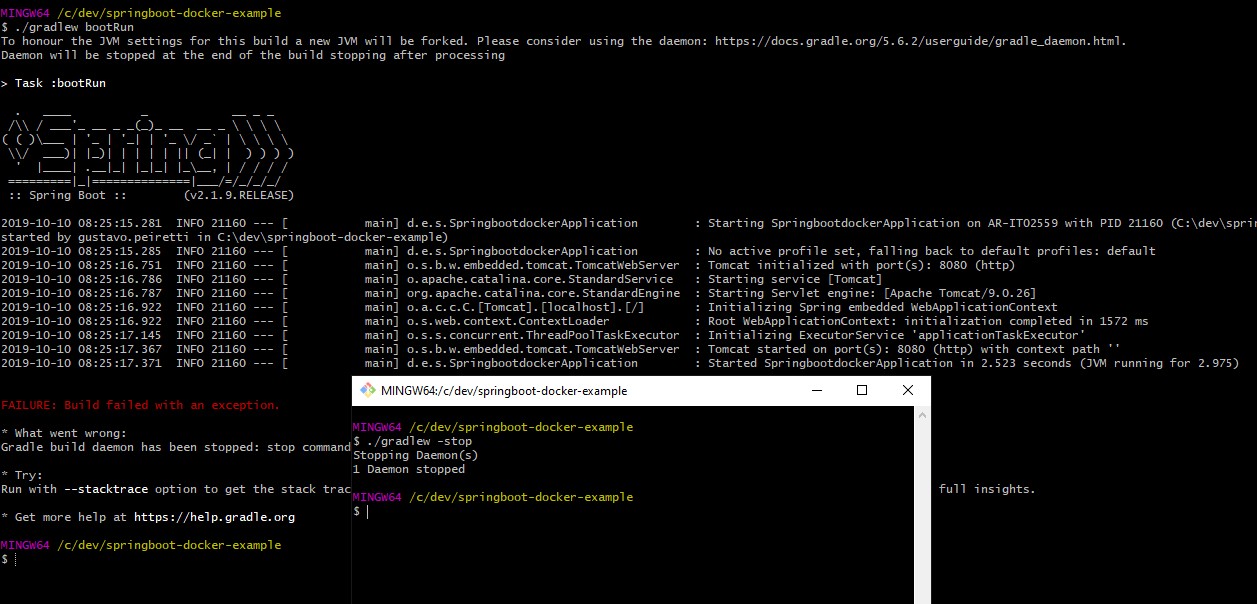
Finish the execution of SpringBoot with Gradle by pressing Ctrl + C. If you cannot finish gradlew when you press ctrl + c, you will have to open another console and run ./gradlew -stop
Build your Spring Boot application
Before continuing with the other steps, be sure to make a build of the project to make available the jar file that we will need later.
with gradle
Gradle leaves the jar in the \build\libs folder of your project with the name you have in the settings.gradle file.
gradlew build

Gradle create jar file with the name you have specified in the settings.gradle file.

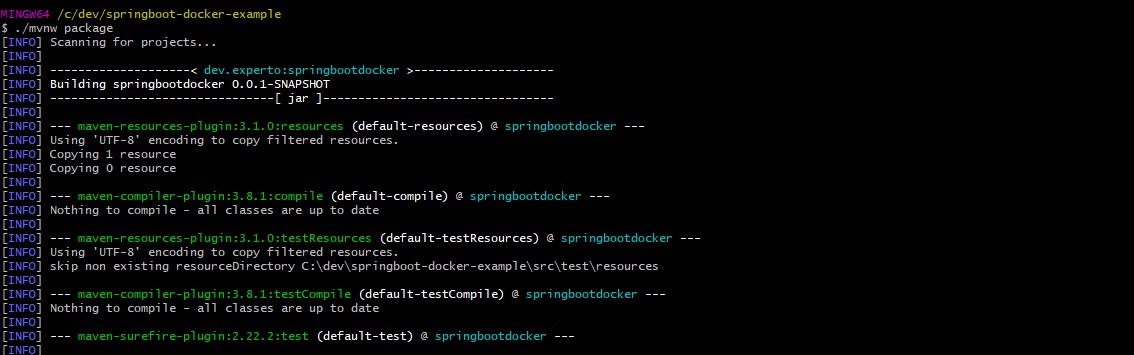
with maven
Maven leave the jar in the \target folder of your project with the name you have defined in the artifactId tag of your pom.xml file
mvnw package
Create a Docker file to run SpringBoot
ok, you already have your service application running.
Now, You will start configuring Docker so that your service runs there.
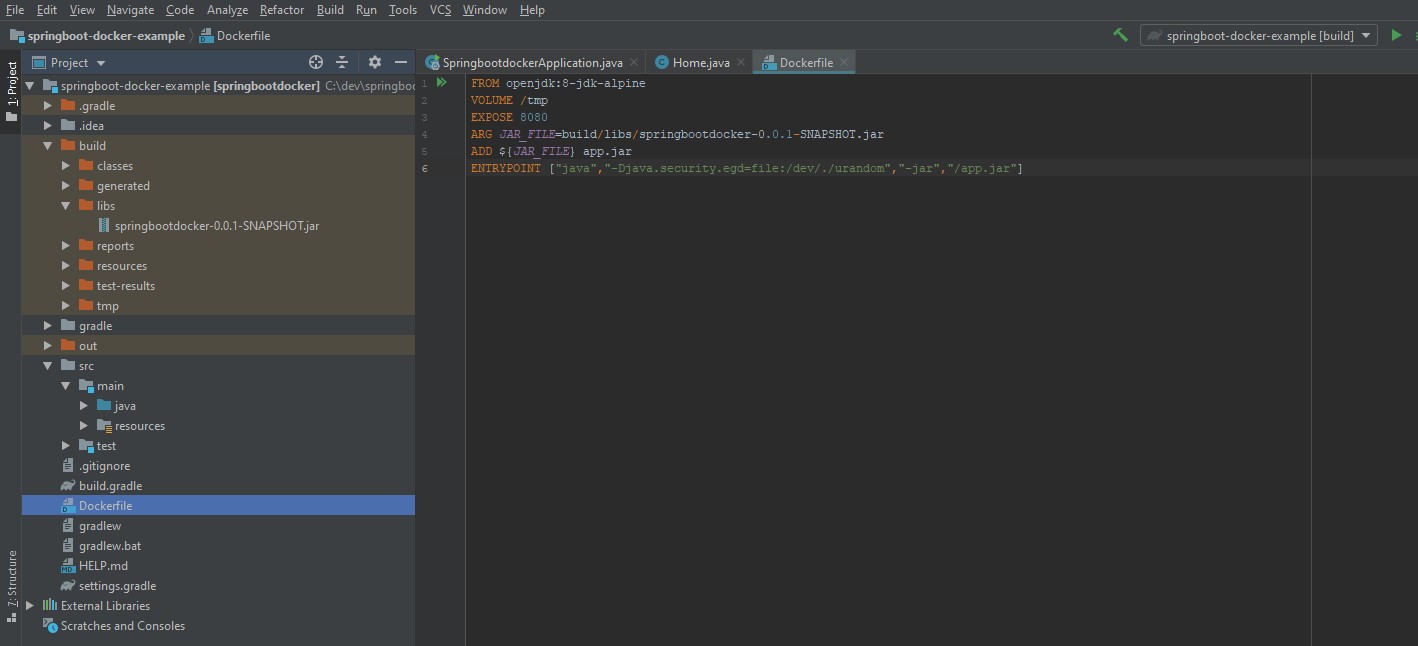
To create the Docker configuration for SpringBoot, create a Dockerfile text file with these instructions:
FROM openjdk:8-jdk-alpine
VOLUME /tmp
EXPOSE 8080
ARG JAR_FILE=build/libs/springbootdocker-0.0.1-SNAPSHOT.jar
ADD ${JAR_FILE} app.jar
ENTRYPOINT ["java","-Djava.security.egd=file:/dev/./urandom","-jar","/app.jar"]
FROM: Note that in the first line you use a docker image that is already armed with linux and java 8. That is, our service will run on a linux and Java 8 system.
ADD:
The ADD instruction copies our application into Docker.
Our gradle or maven config leaves the file jar with the name “springbootdocker-0.0.1-SNAPSHOT.jar”.
This springbootdocker-0.0.1-SNAPSHOT.jar file is added to the container with the instruction ADD with the name app.jar
If the path of your jar application is elsewhere, you must modify it with the correct route. In the event that you have created your app with maven, you must use the path of the maven target.
ENTRYPOINT: Then we execute the file when starting docker with the instruction ENTRYPOINT
Once the Dockerfile file is defined, you run docker build. The -t parameter defines the name that we will give to the container and that we will use later to execute it.
docker build -t springbootdockerexample .
Look in the console with what happens with your Docker config you created.
In each step you see that the linux image with java 8 (FROM) is created, after port 8080 is exposed from the container to the container host (EXPOSE), the jar (ADD) is copied and executed (ENTRYPOINT) .
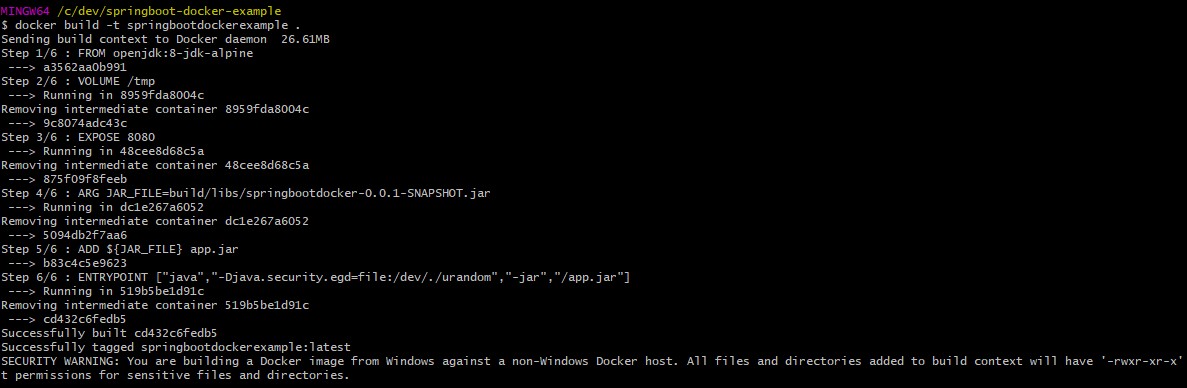
After the build of the docker is finished, you can execute it with the name you gave it.
Running Docker with Spring Boot
With the docker image ready, you can now run it with docker run The -p parameter tells Docker to expose port 8080 of our application that is running inside the container, on port 5000 of the operating system.
docker run -p 5000:8080 springbootdockerexample
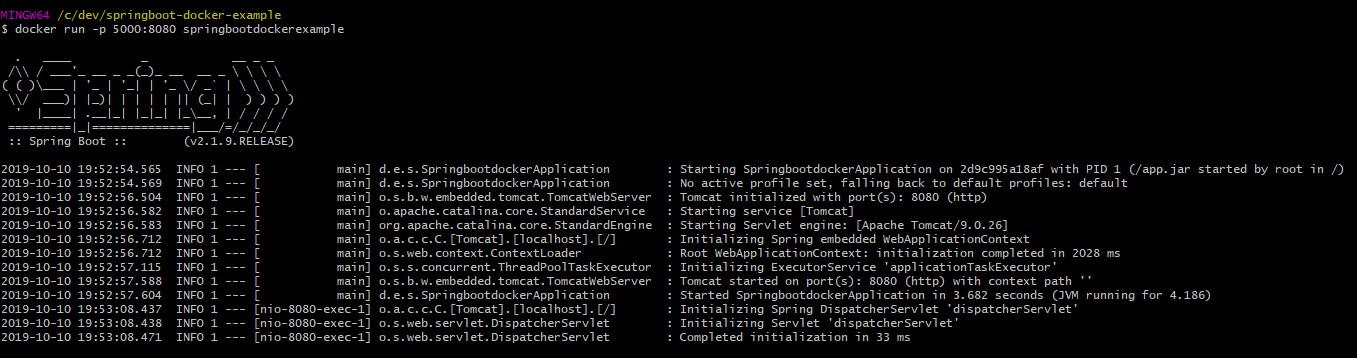
Now you open the URL pointing to the port you told docker. In this case 5000 http://localhost:5000/
Smile your application is working in a Docker container!

Create the Docker image with Spring Boot using Gradle
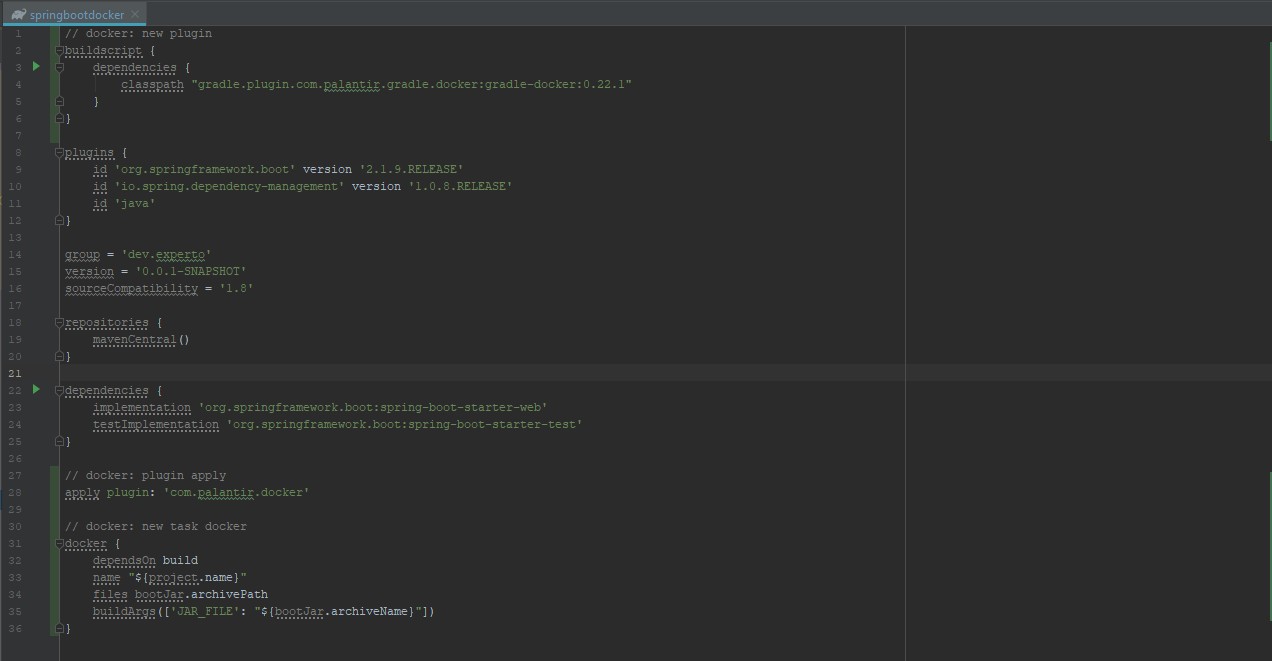
If you use Gradle you can add a plugin to build the image and execute it directly from the Gradle commands. For this, you have to modify the build.gradle file by adding this plugin https://github.com/palantir/gradle-docker
The new thing you add is what you see in buildscript, then the apply of the plugin and finally a new task docker.
// docker: new plugin
buildscript {
	dependencies {
		classpath "gradle.plugin.com.palantir.gradle.docker:gradle-docker:0.22.1"
	}
}

plugins {
	id 'org.springframework.boot' version '2.1.9.RELEASE'
	id 'io.spring.dependency-management' version '1.0.8.RELEASE'
	id 'java'
}

group = 'com.gustavopeiretti'
version = '0.0.1-SNAPSHOT'
sourceCompatibility = '1.8'

repositories {
	mavenCentral()
}

dependencies {
	implementation 'org.springframework.boot:spring-boot-starter-web'
	testImplementation 'org.springframework.boot:spring-boot-starter-test'
}

// docker: plugin apply
apply plugin: 'com.palantir.docker'

// docker: new task docker
docker {
    dependsOn build
    name "${project.name}"
    files bootJar.archivePath
    buildArgs(['JAR_FILE': "${bootJar.archiveName}"])
}
Let’s analyze the new docker task of the gradlew build file that we have modified:
- dependsOn build we tell you that this task depends on the build of gradle
- name “${project.name}” will be the name of the container, we will give you the name of the project that we have in settings.gradle
- files bootJar.archivePath will make the jar file generated by the build available
- buildArgs ([‘JAR_FILE’: “$ {bootJar.archiveName}"]) sends as an argument the name of the jar file.
Running the Docker image with Spring Boot using Gradle
If you have already modified your build file by adding the com.palantir.docker plugin, you can directly execute the build and create your image from gradle.
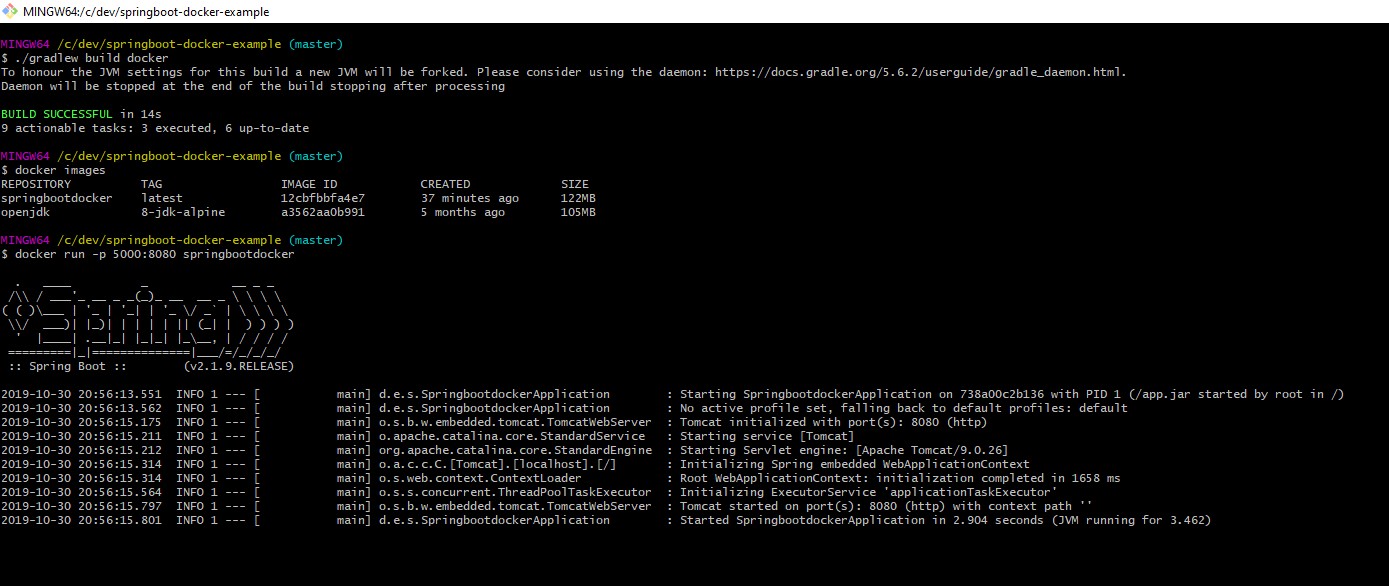
From your console, you will use gradlew build docker to build an image
gradlew build docker
docker run -p 5000:8080 springbootdocker
Create the Docker image with Spring Boot using Maven
In the case of using Maven, you must add this plugin if you want to create the image directly from mvn https://github.com/spotify/dockerfile-maven
            <plugin>
                <groupId>com.spotify</groupId>
                <artifactId>dockerfile-maven-plugin</artifactId>
                <version>1.4.9</version>
                <configuration>
                    <repository>${project.artifactId}</repository>
                    <buildArgs>
                        <JAR_FILE>target/${project.build.finalName}.jar</JAR_FILE>
                    </buildArgs>
                </configuration>
                <executions>
                    <execution>
                        <id>default</id>
                        <phase>install</phase>
                        <goals>
                            <goal>build</goal>
                            <goal>push</goal>
                        </goals>
                    </execution>
                </executions>
            </plugin>
Your full pom.xml looks like this:
<project xmlns="http://maven.apache.org/POM/4.0.0" xmlns:xsi="http://www.w3.org/2001/XMLSchema-instance"
         xsi:schemaLocation="http://maven.apache.org/POM/4.0.0 https://maven.apache.org/xsd/maven-4.0.0.xsd">
    <modelVersion>4.0.0</modelVersion>
    <parent>
        <groupId>org.springframework.boot</groupId>
        <artifactId>spring-boot-starter-parent</artifactId>
        <version>2.1.9.RELEASE</version>
        <relativePath/> <!-- lookup parent from repository -->
    </parent>
    <groupId>com.gustavopeiretti</groupId>
    <artifactId>springbootdocker</artifactId>
    <version>0.0.1-SNAPSHOT</version>
    <name>springbootdocker</name>
    <description>Demo project for Spring Boot with Docker</description>

    <properties>
        <java.version>1.8</java.version>
    </properties>

    <dependencies>
        <dependency>
            <groupId>org.springframework.boot</groupId>
            <artifactId>spring-boot-starter-web</artifactId>
        </dependency>

        <dependency>
            <groupId>org.springframework.boot</groupId>
            <artifactId>spring-boot-starter-test</artifactId>
            <scope>test</scope>
        </dependency>
    </dependencies>

    <build>
        <plugins>
            <plugin>
                <groupId>org.springframework.boot</groupId>
                <artifactId>spring-boot-maven-plugin</artifactId>
            </plugin>
            <plugin>
                <groupId>com.spotify</groupId>
                <artifactId>dockerfile-maven-plugin</artifactId>
                <version>1.4.13</version>
                <configuration>
                    <repository>${project.artifactId}</repository>
                    <buildArgs>
                        <JAR_FILE>target/${project.build.finalName}.jar</JAR_FILE>
                    </buildArgs>
                </configuration>
                <executions>
                    <execution>
                        <id>default</id>
                        <goals>
                            <goal>build</goal>
                            <goal>push</goal>
                        </goals>
                    </execution>
                </executions>
            </plugin>
        </plugins>
    </build>
</project>
Running the Docker image with Spring Boot using Maven
Once you have added the https://github.com/spotify/dockerfile-maven plugin you run:
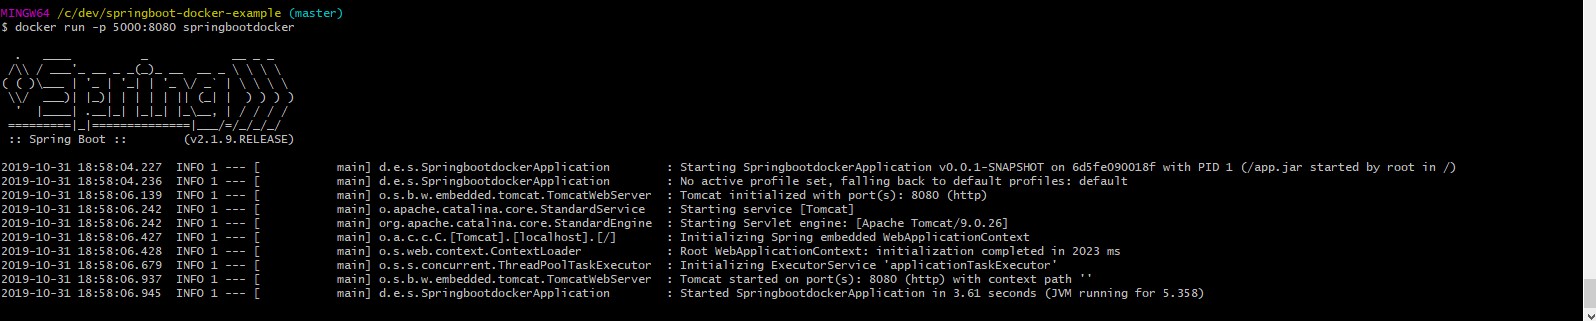
mvnw dockerfile:build
docker run -p 5000:8080 springbootdocker

When you execute docker run your app will remain in the url localhost:5000
A summary of the docker commands that were useful in this post:
- docker build to create the docker image
- docker run to run the docker image
- docker images see the docker images you have available.
As always this code can be found by GitHub
https://github.com/gustavopeiretti/spring-boot-examples/tree/master/spring-boot-docker-example
Conclusion
You learned how to create a Spring Boot Rest application, configure a dockerfile for your application, build your Docker container and run your microservice from the container. You also learned some basic docker commands.