To create a web application in Spring Boot we first need to determine the minimum libraries and then create the main java of the application to start the service. We will see here how to create the Spring Boot main to start it.
The minimum dependency Spring Boot needs to start up
For this application we will use the spring-boot-starter-web dependency that provides the whole library package for an application that responds to web requests.
dependencies{
   implementation 'org.springframework.boot:spring-boot-starter-web'
   testImplementation 'org.springframework.boot:spring-boot-starter-test'
}
In this other post we talked about these started dependencies and their usefulness for building our services.
Spring Boot main and its annotation
To start our application the first thing we need to do is to create a class with the main method. We annotate the class with SpringBootApplication and instruct Spring to start with SpringApplication.run(…) .

What does the SpringBootApplication annotation do?
If we go inside the annotation SpringBootApplication we can see that this boot annotation is the sum of the annotations SpringBootConfiguration, EnableAutoConfiguration, ComponentScan.

SpringBootConfiguration: indicates that a class provides the configuration of the application. It is an alias of @Configuration with the difference that SpringBootConfiguration allows Spring to find the configurations automatically.
@EnableAutoConfiguration: allows Spring Boot to automatically configure the application and register the beans for use. This autoconfiguration is applied based on application dependencies. Autoconfiguration attempts to avoid tedious configurations by using Spring’s intelligence to make decisions regarding common configurations.
ComponentScan: gives Spring the directive to do a search for all components annotated inside the packages. That is, it will search for everything annotated as @Component and its child classes (Service, Repository, Controller) registering them in their context.
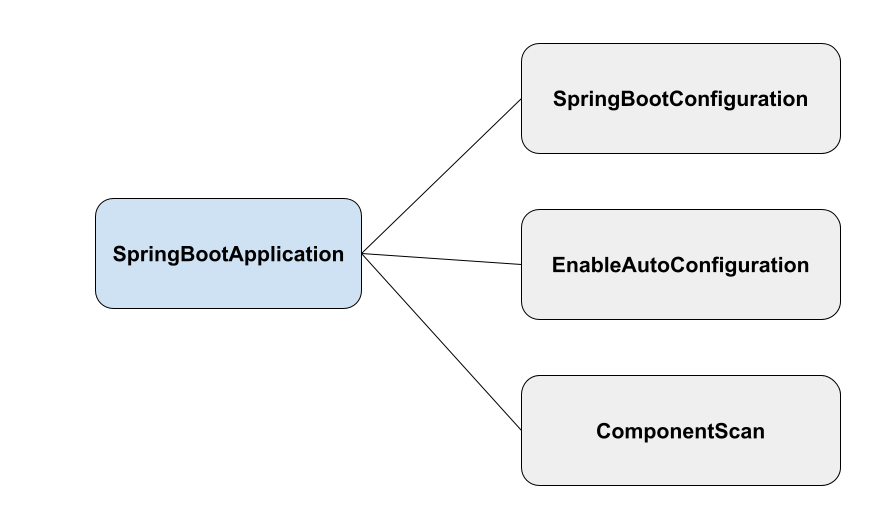
Summarizing up to this point, the @SpringBootApplication annotation instructs Spring Boot to look for @Beans from config, it also enables auto-configuration by letting Spring make decisions regarding default configurations and performs a scan for components in the application.
How to start the application with SpringBootApplication
Once we already have the main of the application annotated with @SpringBootApplication and with the instruction SpringApplication.run(…) , it is ready to start.
Our application looks like this.
We use here Gradle as dependency and application build manager.
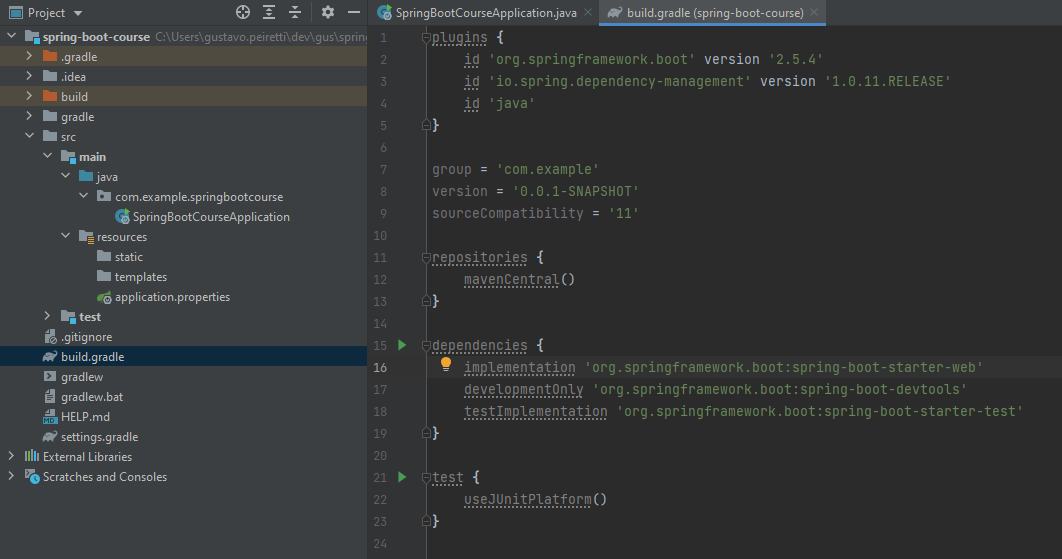
build.gradle
plugins {
	id 'org.springframework.boot' version '2.5.4'
	id 'io.spring.dependency-management' version '1.0.11.RELEASE'
	id 'java'
}

group = 'com.example'
version = '0.0.1-SNAPSHOT'
sourceCompatibility = '11'

repositories {
	mavenCentral()
}

dependencies {
	implementation 'org.springframework.boot:spring-boot-starter-web'
	testImplementation 'org.springframework.boot:spring-boot-starter-test'
}

test {
	useJUnitPlatform()
}
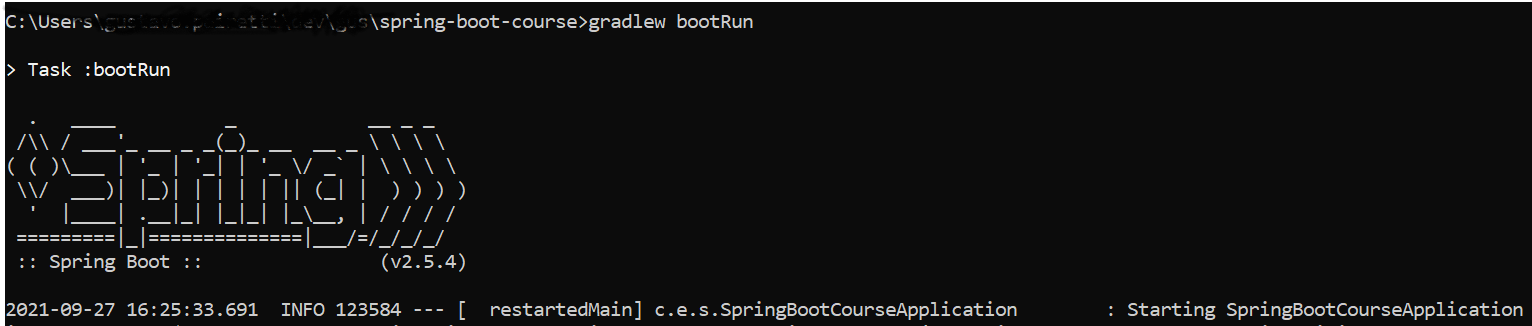
What command is used to start Spring Boot?
The instruction to start our Spring Boot application from the command line is gradlew booRun .
Located in the path where we have our application we execute gradlew booRun .
gradlew booRun
In linux ./gradlew booRun

In Windows gradlew booRun
Conclusion
The Spring Boot main is quite simple, with a few lines and dependencies we can create and start our Spring Boot application.
The SpringBootApplication annotation is used for Spring to configure the application and look for the components we need. To start the application we use gradlew booRun with gradle .