Here we are going to learn the basic command to build and, run Spring Boot application with Gradle Wrapper
For this post, we suppose that we have a Spring Boot project with Gradle.
Gradle Wrapper
You can use Gradle without installing it on your computer. Gradle wrapper (gradlew) is a script you can add to your project to execute and build without external installations.
We learn how to create a Spring Boot with Gradle wrapper here.
With Gradle Wrapper you can:
- Include Gradle in your project without external installations.
- Change the Gradle version for your project without affecting other projects.
- Add Gradle to your system version control.
- Use the correct version of Gradle for your project.
What, and why Gradle?
Gradle is used to compile, run tests, and build your application.
Gradle provides an easy way to create tasks and run them to execute different steps in an orderly and controlled mode.
At the same time, Gradle provides a solid system of dependencies.
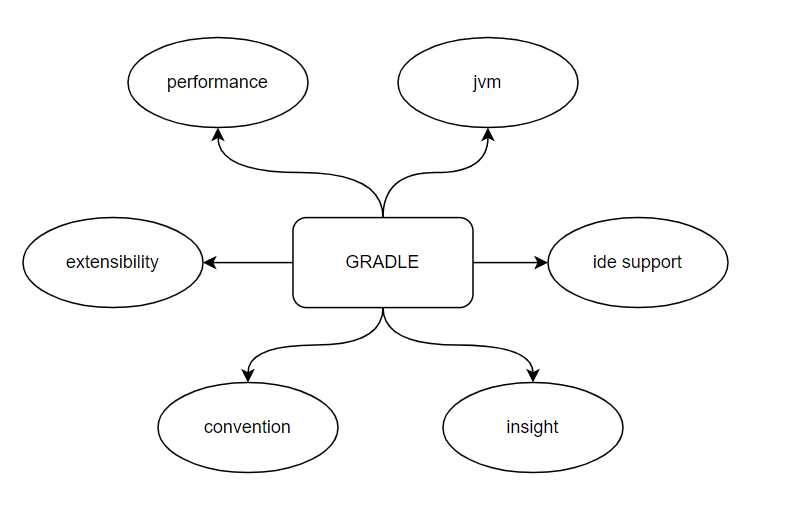
Some of the best characteristics of Gradle are:
- Performance: it is faster and it has optimizations.
- JVM: Gradle runs on JVM and uses standard Java API.
- Extensibility: Gradle provides predefined tasks but, you can also provide your own tasks.
- ID support: Android Studio, IntelliJ, Eclipse, Etc have Gradle support
- Convention: Gradle uses conventions that allow you to quickly adopt this build system.
- Insight: provide detailed information you can use to understand what happens with your build.
GRADLE FOLDER AND FILES
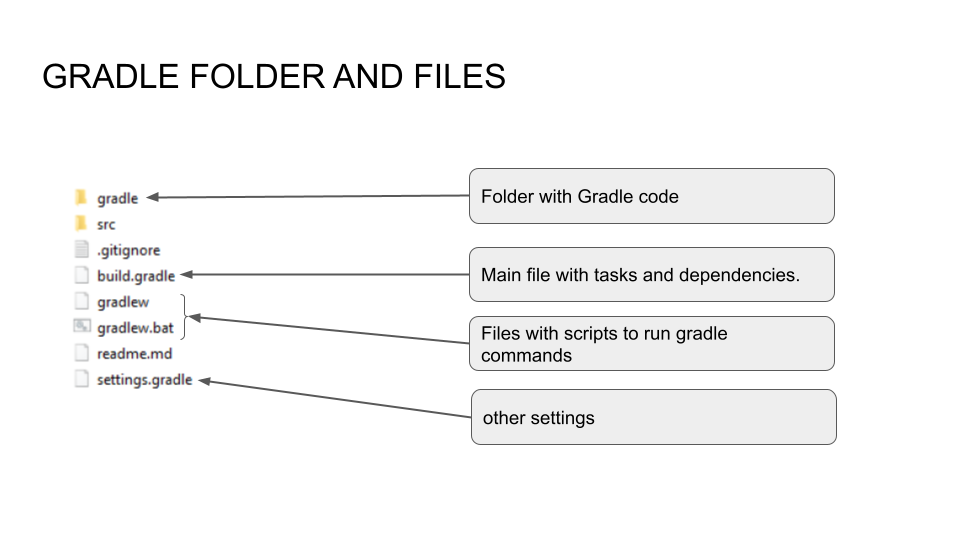
In a Spring Boot project with the Gradle build system, we have these folders and files:
- gradle folder: with the Gradle code compiled
- build.gradle file: this is its own main file. We edit this file to create our own tasks and add dependencies.
- gradlew file: script bash to run Gradle in Linux
- gradle.bat file: script batch to run Gradle in windows
- setting.gradle file: other settings like the name of the project
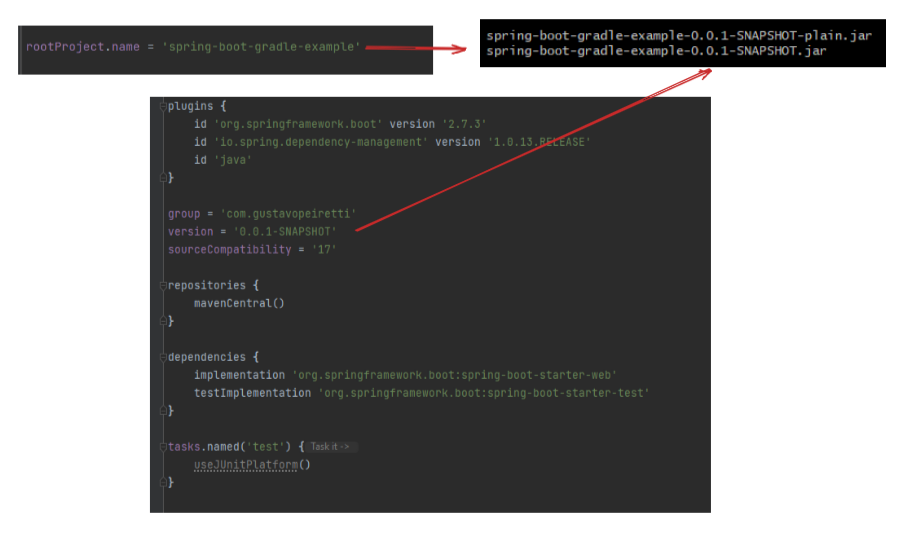
The build.gradle file
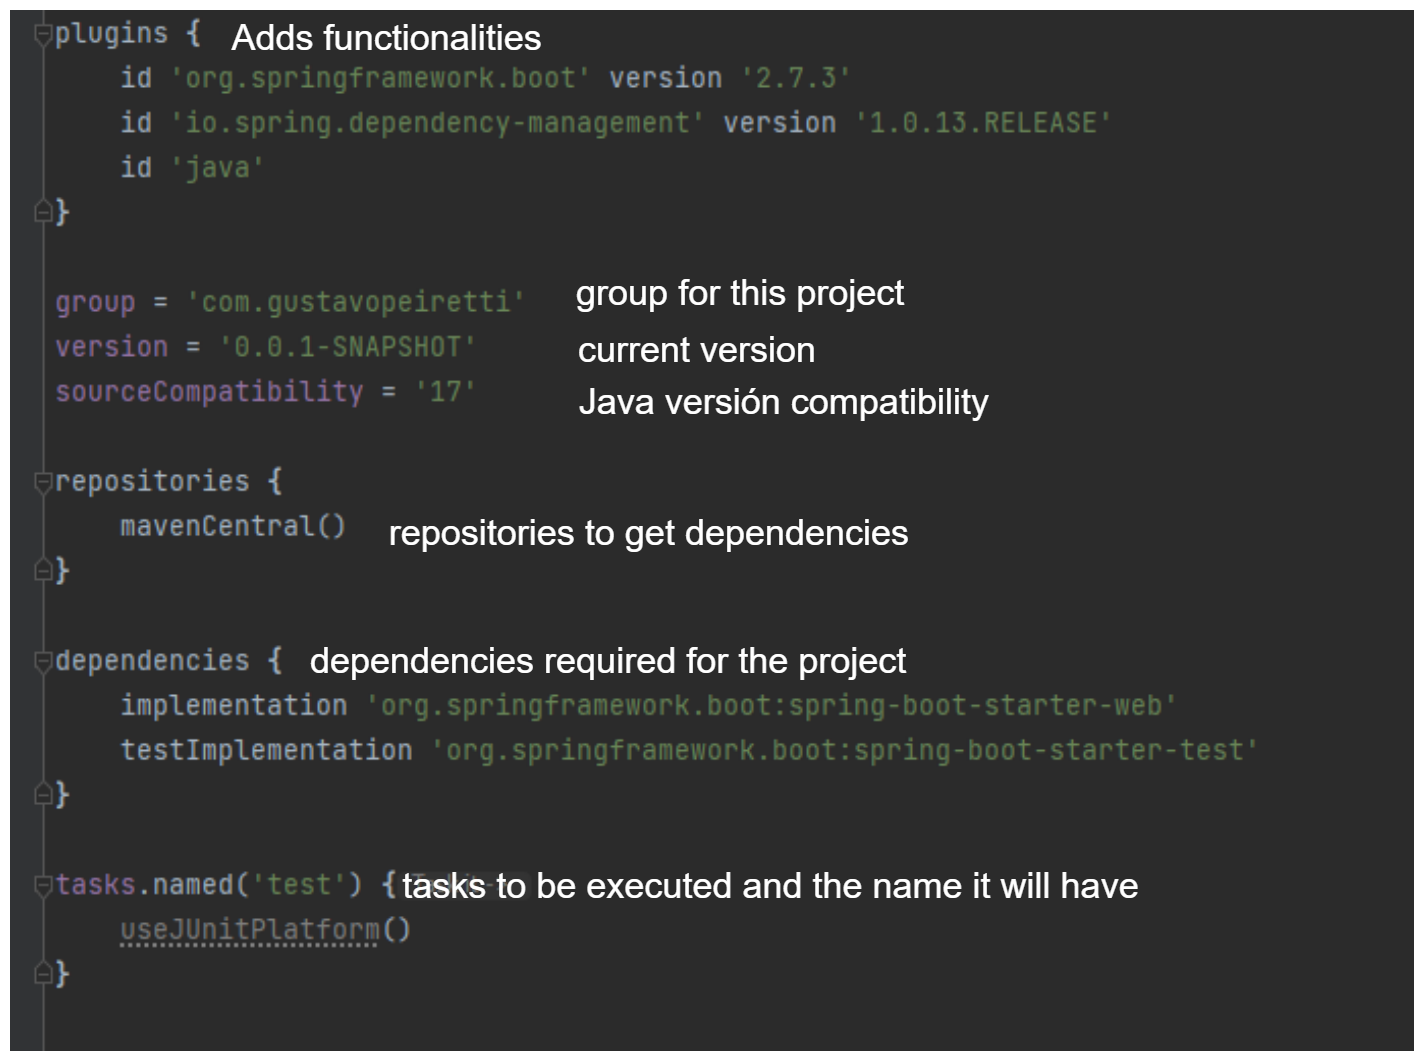
Inside the build.gradle file, we can observe this sections
Plugins: provide functionalities like compiling Java code, running Spring Boot, and setting project structure.
Group: the group of which this project will be part.
Version: the current version of the project.
Source compatibility: the compatibility with the Java version.
Repositories: the repository section is the place where we indicate from where we want to download the dependencies
Dependencies: the dependency section is where we write down the dependencies we require for our project.
Task: a task is a sequence of actions with its name.
Plugins you need in Spring Boot Project
- Spring Boot: this plugin allows you to run Spring Boot applications, and create a package executable jar or war archives.
- Spring dependency management: this is a convenient plugin that will automatically import the spring-boot-dependencies from the version of Spring Boot that you are using. It lets you skip version numbers when declaring dependencies.
- Java: this plugin provides all necessary activities for a Java project like compilation, testing, and building capabilities.
plugins{
   id 'org.springframework.boot' version '2.7.3'
   id 'io.spring.dependency-management' version '1.0.13.RELEASE'
   id 'java'
}
Main commands for Spring Boot and Gradle
We can see a short brief of Gradle with info about the version that we have in our project.
Linux ./gradlew Windows gradlew.bat
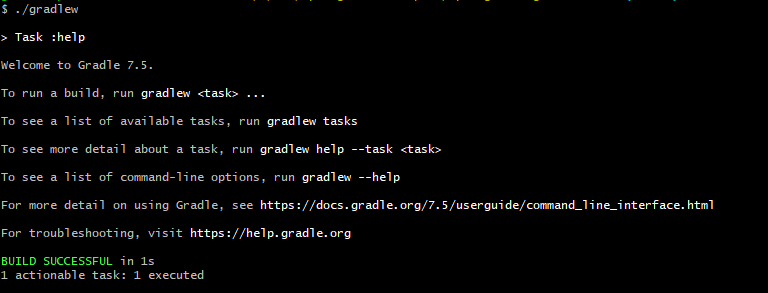
We run the gradlew tasks command to know what tasks we have.

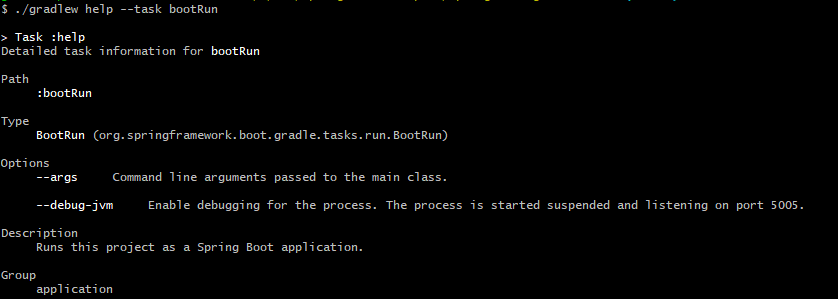
If we want more detail for a specific task, we can run ./gradlew help –task
For example ./gradlew help –task bootRun
The main Gradle wrapper tasks of a Spring Boot project
To perform these tasks, we need the plug-ins that we already mention above.
plugins{
   id 'org.springframework.boot' version '2.7.3'
   id 'java'
}
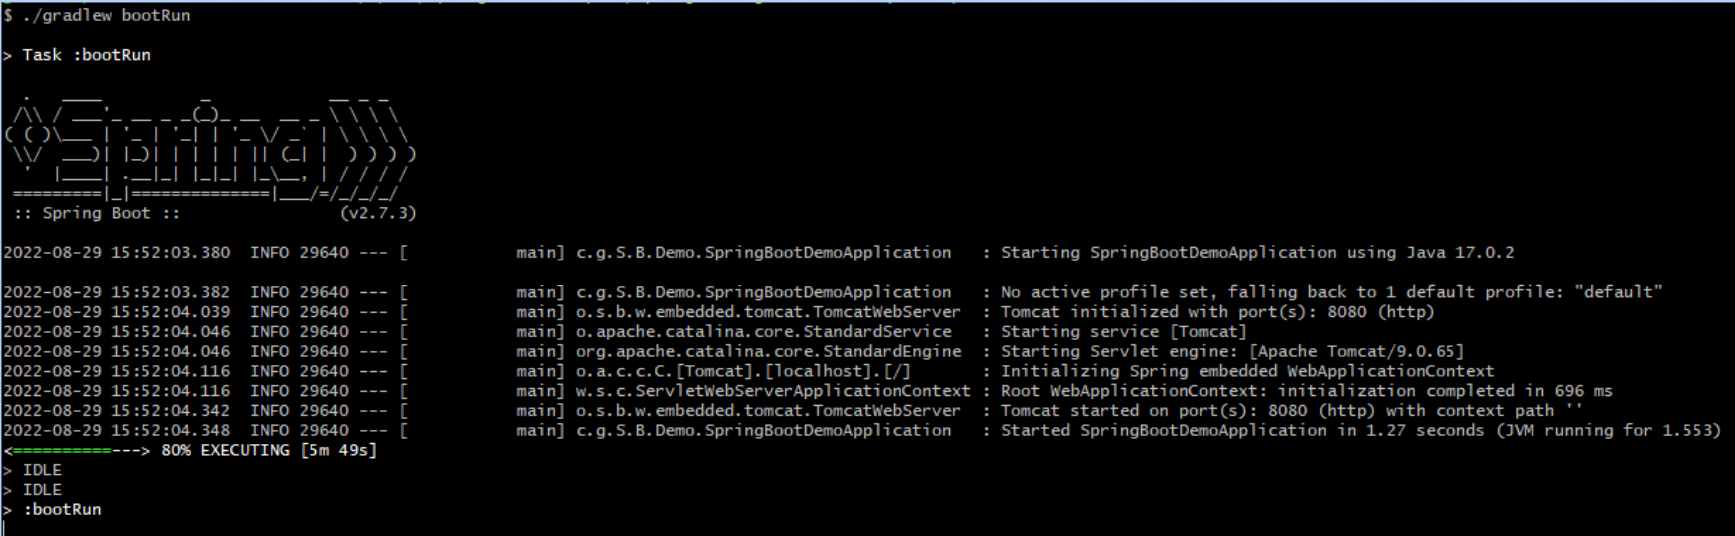
Run Spring Boot project → gradlew bootRun
With this command, we start our application on the default port 8080.
Build Spring Boot project → gradlew build
You can run gradlew build -i to see more information.
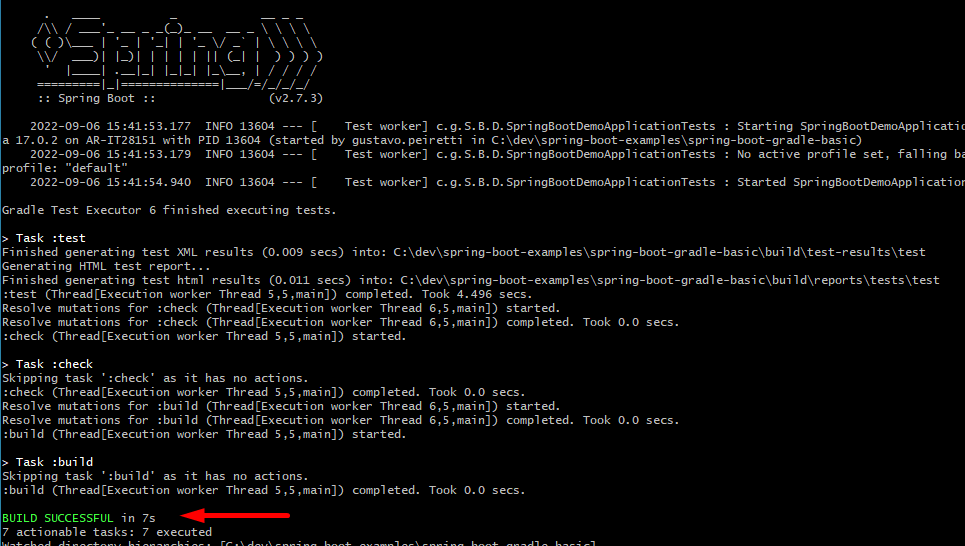
This command will run several tasks like configure, download dependencies, compile Java classes, run tests, and create “jar” files.
The executable jar files can be found with the name and version in build/libs folder. You can also see inside the build folder the sub-folders with the compiled classes, external dependencies and test results.
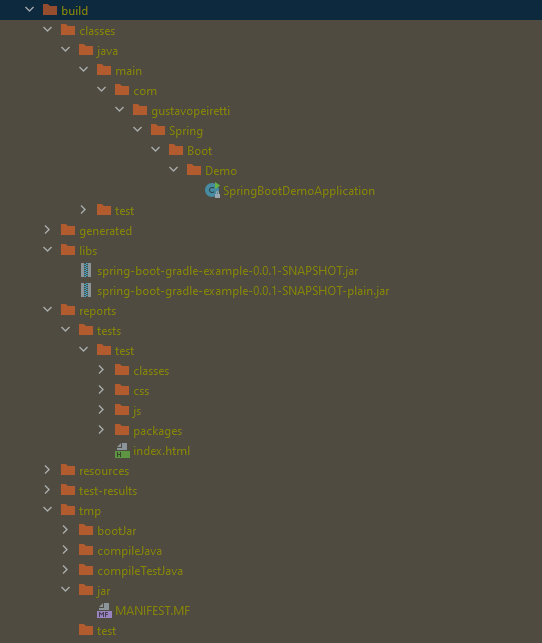
This creates an executable Java jar file.

The name comes from the settings.gradle file and the version comes from build.gradle
Clean Spring Boot project → gradlew clean
This command remove the build folder.
Run Test Spring Boot project → gradlew test
This task will execute all tests in our project.
./gradlew test -i (the “-i” param add more info to the console)
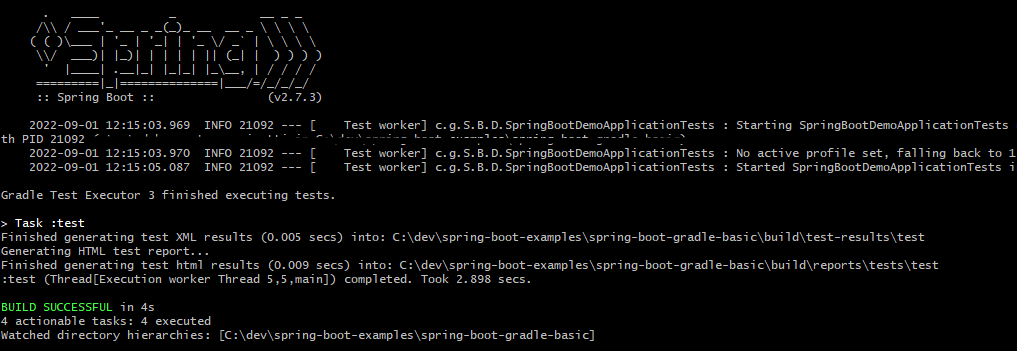
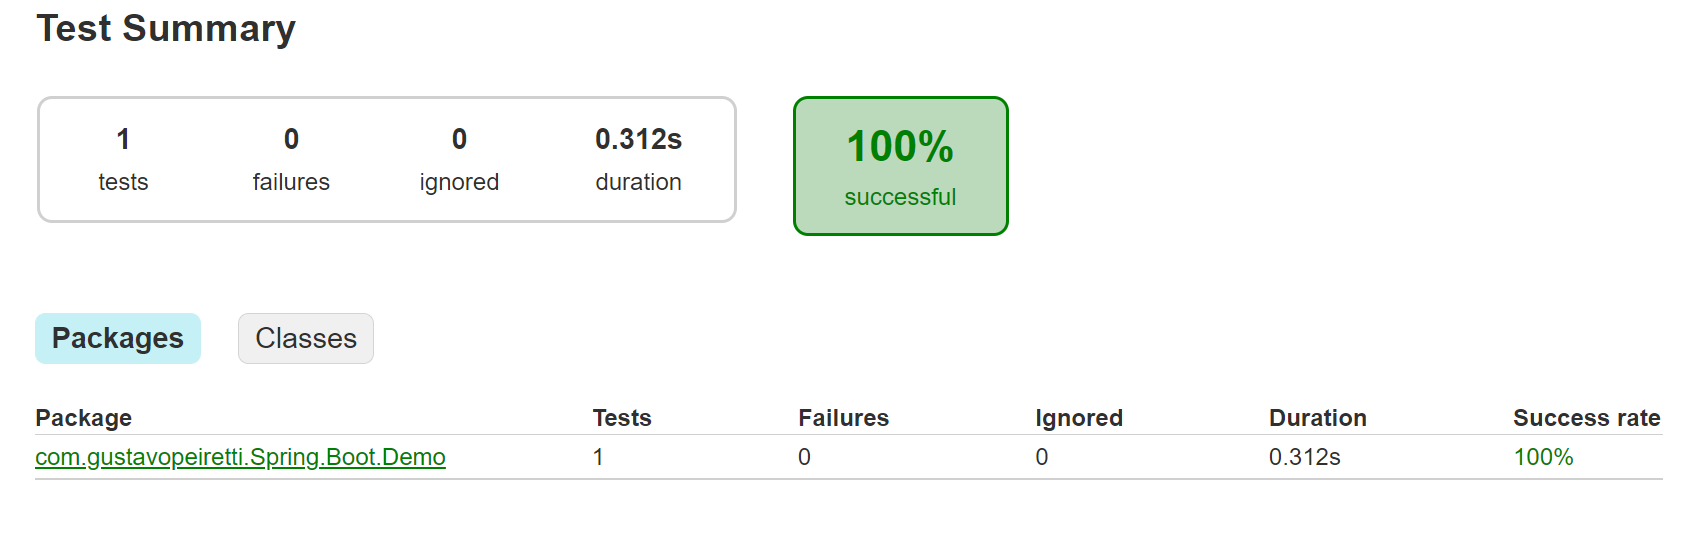
Note that on the console we have a result test and an HTML report with good detail

If we open the index.html file in this location, we can see the report.
This report is very complete and can help you if you have many tests.
Conclusion:
This post taught us how to run, build, and execute tests in a Spring Boot project with Gradle. Gradle is an excellent build management and a good choice for your Spring Boot project.
References:
Spring Boot Gradle Plugin Reference Guide
The Java Plugin (gradle.org)